December 12, 2008

Jen's page

My cousin Jennifer had Baby Cashew, aka Raegan in October and since I know she loves to scrapbook but has no time cause of the baby, I made a baby shower layout using the pics my aunt sent us:


My cousin is doing a jungle theme in Raegan's room, so hence the critters:
I only glued the large pic on three sides, creating a pocket for a tabbed card that holds all the gift info on it. Even if this is in a page protector, you can still grab it out from the top (I hate it when people make interactive page elements that you can't access through a page protector!).
What do we learn from this? Save your scraps! This layout was dirt cheap because I didn't buy anything for it- all the animal pieces are cut from cardstock scraps. I designed the animals myself, but you could find animal or other shapes online to trace or even trace cookie cutters. I pre-poked holes in the cardstock before stitching with embroidery floss (which is pretty stinkin' cheap) so that sewing was easier. When sewing on cardstock, you have to be careful that you don't pull too hard or you'll rip through your paper. You don't even have to have knots on the back- I secured the ends of the thread with a little adhesive. I used ric-rac for the alligator's teeth- I love glue dots for attaching things like that on pages. I used my smaller scalloped scissors on the big pic and my huge scalloped scissors on the smaller pic.
Another trick on this page was the collage of all the shower pics- I scanned the pics, then created the collage in Photoshop Elements (I made sure it was 8x10) and then got it printed as an 8x10 enlargement at Walmart. Much cheaper than getting a bunch of little wallets printed (which is what I had to do before I had Photoshop at my house!). With most pictures, you don't need to see them big, you just need them to get a sense of what took place.
I haven't made a page for awhile, it felt good to do so. I liked it alot, it was hard to mail away!

December 9, 2008

Pattern

I was going through my mom's box of old patterns this weekend- most were ugly clothes patterns from the 70's and 80's, but I found this gem. It was made in 1963! One of these days I'll make me a bag...and if it turns out well enough this could be an Etsy item!

December 5, 2008

Blue Foam

Ode to Blue Foam


by Elizabeth Chaney

Blue Foam is everywhere

In my nose,

In my hair...

Yes even in my underwear!

Blue Foam is everywhere. (cough)


I've spent the past few weeks working on my final project for 3-D art- an abstract sculpture carved from dense insulation foam. All the little bits of foam stick to you, no matter what you do! After class I looked the abominable snow-woman! The room looked like a snowglobe! I would shed blue foam wherever I went. I'm so glad I don't have to breathe it in anymore and that this project is over! It was hard coming up with an interesting abstract sculpture and I think mine was fine but maybe now I'd tweak it. It was interesting to learn a new building technique- now I can make anything I want!


The maquette:


You laminate pieces of foam together with spray adhesive:


Then carve with a small saw and files:


Then I pegged the appendages on and covered it with Durham's- a dry putty mix that you mix with water to create a hard skin:


Here is my turkey-stegosaurus-bunny ear-cat whisker-melted peep:


(I got so many funny comments as to what it looked like!)


Don't ask why I gravitated to BRIGHT yellow- I don't know!


Here are a few that I liked alot from my classmates:


And here's some not-so-hot ones, unfortunately two of the worst offenders took off with their project before I could snap a picture:
Boring shapes, boring color, boring assembly


A Renaissance Yoda Mermaid?


A shrimp? A fetus? And not well carved or painted at that. That kink in the tail is terrible!


My friend Mike did this one...not bad but he needed more dintinct shading. It looks like it could be in a park! We joked about it needing some graffiti!

The shape is pretty interesting, but the paint does nothing for me! The muddy gray just makes it blah and takes away from the shape. (below)


Everyone in class really gravitated towards this one...but not me. I think they were all distracted by the fact that it was covered in candy....if it was just painted would they find it as interesting??? I think not.


Here's D's bug (or an antelope? I don't know):


D (the girl who couldn't see the carousel horse in my cardboard project) made an ugly bug thing (above) and I was so tempted to walk over to her and say..."You know what I see in your project? If I look real close it looks like...hmmm...a bug!" But I guess I had some class for a moment or two. I liked the bug's body shape before she put a head on it and I don't think the painting goes with the hard edges on the body.

I am getting tired of bailing out crappy slacker art students...I was nice the other day and let a guy from sculpture borrow my leftover spray adhesive...and he thought I gave it to him! And then he walked off with my leftover Durham's cause he thought I said yes to that too. When did I become the supply fairy?? Buy your own! Those cost $16! I probably wouldn't use the leftovers much, but I'm the one who bought them!! And now I'm kicking myself about the Durham's- I got the idea to make little foam ladybugs too late. I guess one of these days I'll buy some more and make some smaller sculptures out of foam leftovers.

Which leads to the question....what do I do with this sculpture now?? It's kinda big (2.5x2.5 ft) to keep but I spent so much time on it to throw it out!

December 3, 2008

Q&A- Scanning

My friend Megan asked me this question:

Q: What is the best way to get QUALITY digital copies of photos when all I have are the actual printed photos?

A: Well, Megan, sounds like you need a good scanner! There's a lot of great scanners out there and I love how technology is getting cheaper and cheaper. Right now I use the crummy scanner at school but all I'm doing right now is scanning photos that go on the web so quality isn't a huge issue. Santa is bringing me an Epson Perfection V300 for Christmas and I can't wait. It has a lot of great features for being only $99!

Now the experts recommend scanning negatives (you always get better clarity from the source than a copy) over prints but you can still get good digital images from your prints.

Ask yourself: Where is this photo going? If you are wanting to make a print from your scan, you'll want to scan at a higher resolution (like 300 dpi) than if the pic is only going on the web (you'll only need a 72 dpi). You'll want a high resolution especially if you want the print to be enlarged.

Make sure your photo and your scanner bed are clean and free of dust and fingerprints. Some scanners come with dust-fixing software, but it's still important to reduce problems in the first place. You can crop and tweak your photos with photo editing software- I enjoy Photoshop Elements cause it's pretty easy to do what I want.

Both Kodak machines and Wal-Mart 1 hour machines have a scanner attached to them, but I don't know how well they work (and who can guarantee that they'll be clean?). You could test it out and see if that works ok for you. You can make prints or cds (or both!) with those machines.

You can visit www.scantips.com for more info on scanning.

A word about photo printing: I HATE Kodak picture machines with a passion but many people use them- I always find their printouts to be really low quality and the color is terrible. Do yourself a favor and use the Wal-Mart 1 hour photo processing instead- they do real good quality and I prefer the matte paper that they use. And they're inexpensive! Your scanned/printed images can look better or worse depending on where you get them printed.

Megan, I hope that answered your question. Let me know if you need any more help.

-Liz

November 18, 2008

Archival Preservation


Note from Liz: This is a subject that I find interesting, I'd love to study museum science! I gathered information on preserving items and thought I'd share. I'm pretty passionate about this subject and I hate to see people making mistakes that will cost them their heirlooms. I think this is an important topic- those who read this blog are generally young, if we learn now how to take care of things, we won't have to try to undo our mistakes later. Also one day you'll probably be inheriting some keepsakes, you should learn now how to take care of them.

My qualifications: My family has always had stuff in storage- some has fared well over the last twenty years and other stuff not so well. We discovered a lot of disintegrating items in the move. I know from experience what works and what doesn't. I have also read extensively on the subject. If there are any questions, let me know.


Above: My first grade class! I am in the top row on the right and I was stinkin' cute if I do say so myself! Sadly these photos are still trapped in an evil magnetic album from the '80s!

=============================================

Guide to Archival Preservation


What causes things to compost?

Answer: Heat, light and moisture!

Do you want your items to become compost? Then keep them away from the biggest offenders!

Heat speeds chemical reactions and causes decay more quickly. Light also does the same thing, especially sunlight or fluorescent light. Ultra-violet radiation from these types of light speeds chemical reactions. Humidity levels above 70% promote mold growth and rapid changes in humidity causes damage as things quickly expand and contract.

Do not store important items in an uninsulated attics or damp basements! They are either too hot or too moist for your items to properly store. If you must store things in your basement, control moisture (both on the ground and in the air) and store items at least one foot off the ground (you never know if your basement might flood!).

The rule of thumb is to store important items in an environment that you find comfortable: not too hot, cold or humid.

Other things to avoid:
  • Acid: Acid eats away, discolors, and destroys items over time. It also turns things brittle. Acid will leach into surrounding non-acidic items and damage them as well. Look for photo albums, paper, adhesives, pens, containers and other products labeled "acid-free". If a product does not say "acid-free", do not assume it is just because it is made for photos.
  • Lignin: Lignin is a substance that gives plants and trees their strength and rigidity. When trees are broken down to make paper, the lignin becomes unstable. Paper that has high amounts of lignin, such as newsprint, is very acidic and yellows very easily. Look for products labeled "lignin-free".

  • Polyvinyl Chloride (PVC): This unstable plastic emits corrosive and acidic gas, which is harmful to photos and other items. PVC generally has a very plastic-y odor.

  • Polyvinyl Acetate (PVA): This is an acidic plastic that causes photos and documents to deteriorate and fade.

  • Dust: It appears soft, but is actually abrasive. Remove dust regularly and keep items as clean as possible. Dry dusting is recommended over sprays and chemicals.

  • Hands: The oils and salts in your hands are very damaging to items. It is helpful to wear white cotton gloves when handling paper, photographs or textiles. Metal objects are also vulnerable to damage from your hands. Handle your items carefully, do not overhandle.

Good things to store your items in:

  • Mylar, Polyester, Polyethylene, Polypropylene: These are inert plastics that are safe for photographs and documents. They do not release harmful gases.

How to care for:

Paper:

  • Remove post-it notes, paperclips, rubber bands, brads and staples before storing important documents. Those items will either break down and stain (rubber bands), leave acid or adhesive (post-it notes), or rust (staples, brads and paperclips).
  • Do not place newspaper clippings, photos and letters in the same storage pocket- separate them out.
  • Archival Mist can be sprayed on newspaper clippings, ticket stubs, etc to neutralize acid.

  • Store important letters, documents, etc, flat when possible. Uncurling tightly curled papers leads to fiber breakdown. Store folded papers (like letters) unfolded and avoid unfolding and refolding as that breaks down the fibers and makes ripping more likely.

  • To store an acidic document, place it between two sheets of quality paper- the acid will leach into the quality paper instead of surrounding documents.

Photos:

  • Color prints, negatives and slides are more delicate and prone to chemical breakdown than traditional black and white.

  • Handle negatives and prints by the edges.

  • Never write on the front or back of a photo- Ink can bleed through over time and pens can dent photos as well. If you must write on your photo, use acid-free, fadeproof, waterproof inks. Sharpies are not archival!

  • Keep negatives separated in plastic sleeves. Do not store negatives touching one another. Negatives from before the 1950's are prone to sticking together and the chemical process used then was prone to combustion!

  • Keep photos and negatives in appropriate acid free sleeves, albums, boxes and containers. The envelopes that photos come in from the developer are not acid-free! Old magnetic albums are BAD for your photos!
  • Don't cut Polaroid photos- they release harmful chemicals.
  • Display copies of photos, keep originals safe from sun damage.

CDs and DVDs:

  • Once thought to last forever, new studies have shown that it is unknown how long cds last. The best guess is 10-15 years.
  • Use high quality, archival discs (like Archival Gold) to store important photos and files. They claim to last several hundred years.
  • Avoid flexing discs, as this creates tiny cracks that can let in moisture and lead to the breakdown of your disc.
  • use an archival pen when labeling discs, as inferior ink can leach into your disc over time and lead to its breakdown.
  • Keep discs away from moisture, especially the kind you burn (I lost my Napoleon Dynamite cd this way!)

Videocassettes and Audio tapes:

  • Store tapes upright (like books), not flat. Storing them flat could lead to distortions.
  • High temperatures can damage tapes.
  • Each use causes wear on the tape, eventually leading to a breakdown of the material. Try to get important recordings transferred to a cd or dvd.

Textiles:

  • Make sure things are truly clean before you store them.
  • Do not store items in a cedar chest- they do not protect items and can actually damage them with fumes and oils.
  • Avoid storing items in plastic- this traps in moisture. You want items to be able to "breathe".
  • Store heirloom items in acid-free boxes. Use acid-free tissue inside garments to limit creasing. On a regular basis, refold item in a different way to avoid permanent creasing.
  • Avoid harsh detergents, use a gentle detergent made for heirloom items (there's many quilt detergents on the market). Vacuuming is often effective.

Paintings:

  • Do not store valued works of art over a frequently used fireplace.
  • Avoid direct sunlight, use indirect lighting. Do not use spotlights on your artwork.
  • Avoid halogen light- it emits high levels of ultraviolet light which is damaging to light-sensitive items.

Printing:

  • When printing documents, laser ink printing is more archival than printing from ink-jet printers. Printing from an ink-jet fades rapidly and will run if you get it wet.
  • Some ink-jet manufacturers (Epson, HP) now have archival printing. You must use their recommended paper and ink to achieve these results.
  • Sprays are available to spray on printed photos to reduce fading. Older home-printed photos are highly susceptible to fading.

Organization:

  • Do for your descendants what you wish your ancestors had done for you...do you wish they had been organized? Labeled photos? Kept a journal? Then do it for the next generation!
  • Don't do what can't be undone! Do not crop, laminate or otherwise alter original documents and pictures. Make Photoshop corrections on a copy, not the original file.
  • Make several copies of important documents and files onto discs,websites, or external hardrives...do not store everything solely on your computer or you will be in trouble when it crashes!
  • Make prints of important files and photos, these could wind up being your only copies if your other options fail.
  • It doesn't matter how much money you've sunk into something if it is going to ruin your items. My mom has a hard time wanting to take photos out of magnetic albums because she "spent so much money on them".
  • Develop a system of organization for photos, documents and computer files.
  • Play the "what if?" game to cover your bases (example: What if I store all my documents on my computer and it crashes? What if I store this in the basement?)
  • Upgrade items to the next technology while it is still relatively easy to do so. Technology moves faster and faster and we have to act fast before our items are lost forever. My mom has things stored on floppy discs from the 80's, I can pretty much guarantee that that info will never see the light of day again. I need to move my digital art projects from zip disks onto cds before it is too late. Small diskettes have pretty much become obsolete, move that info while you can!

I hope that this information helps you preserve your items. I know it sounds like a lot, but a little prevention goes a long way. Think about things before you do them. I'm not perfect at this, but I try. One of these days I'll get my childhood photos out of those magnetic albums!

November 13, 2008

Color


I recently finished reading the book "Color: A Natural History of the Palette" by Victoria Finlay. It was a good read, she goes one by one about all the colors and talks about what people used for colors and dyes before synthetics and how history was made (wars fought, trade routes established, etc) because of color. She visited many different places around the world in her search of the origin of color. I found it to be very interesting. We take a lot of color for granted because we have synthetic dyes and it's very easy to have what we want.

For instance, did you know why Robin Hood wears green? At the time, there was no true green dye- you first dyed something in yellow and then in blue. Since you were using two dyes, your clothing was twice as expensive plus it was hard to get consistent colors, making it more valuable. So green was for the rich. Robin Hood's wearing green was another way of thumbing his nose at the rich.

Neat, huh?

November 11, 2008

Yo-Yo


I see a lot of yo-yo quilts and projects in my books and magazines, and for awhile now I wondered just how do you make a yo-yo? They always talk about them and just assume you know how to make one. I feel kinda silly cause they are really simple! Well, the internet is my friend and here is a nifty little tutorial on how to make them. You learn something new everyday and I just learned this!

Books

You gotta love book sales...every now and then our little library does a sale of donated books, and without trying I wound up there at the start of dollar bag day! Got some good stuff:

Gotta love old art books...the information pretty much stays the same over time! This one has a lot of good color images that I don't have in other books- some old art books are black and white... what's the point?

It's falling apart, but there's a lot of good info about how to make all kinds of paper flowers!

This Simplicity booklet is from 1940 and in good condition. My grandmother modeled for late 1940's Butterick and McCalls pattern catalogs when she was young, I'd love to find one of those!


I picked up this little book simply because the fabric cover is so cute- it'd be cute to prop up in a sewing room! The info inside is good too- it's a little encyclopedia of every type of fabric there is.


Old quilt books sometimes have good stuff, too.


Gotta love old 1980's craft magazines...sometimes there is good ideas and patterns that just need some streamlining and modernizing!


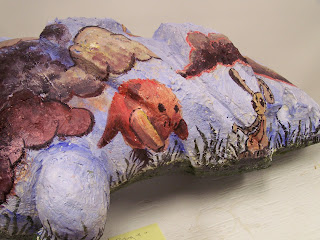
All for a dollar! Gotta love small towns.


October 30, 2008

Secrets

Inspired by Lisa's post about her secrets, I thought I'd post some of my own. Since I have no need for nipple cream (see Lisa's post), I thought I'd direct this towards my being thrifty/crafty.


  • You can find a lot of free patterns and templates for crafts online, I just google what it is I want. I've found some great quilt patterns and baby bootie patterns by doing that.


  • If you can't find what you want online, try JoAnn's- but watch the circulars for when they have patterns on sale for a $1 or $1.99. That saves you a good $15! I usually don't need a pattern for a specific deadline, so I make a list of what brands/pattern numbers I want and then buy them cheap when it's on sale. I've got a lot of great patterns this way- skirts, bags, tree skirts, etc.


  • If you need a pattern for a deadline, don't buy it at Joann's...go down the street to Wal-Mart. Their patterns are always half off of retail price and they have a pretty good selection.

  • I like to pick up pre-measured fat quarters of fabric at JoAnn's when they go on sale for $1- there's lots of great prints available and I use them for projects and on scrapbook pages.


  • Sign up for coupons- I use a coupon whenever I go to Michael's or JoAnn's. At BB&B, do your math- are you going to save more with a 20%, a $5 off of $15 purchase or the new $10 off of $30 coupon? I used to have to tell customers all the time that the other coupon in their hand would save them more!


  • Go online: Since I don't have access to a lot of stores out here, I can usually find specific scrapbooking products I want on ebay and it's usually not too expensive. I used to buy nifty butterfly plates on ebay too. I go to Amazon for books, they're always cheaper and you can get free shipping for orders over $25. I get most of my photo/art books that way.


  • I love to go junking- and out here in rural PA you can find some good deals. Would you believe I got these silver pieces for $1.99 ea? They're in really good condition too. One even says "William Rogers" on the bottom- good stuff. I find treasures for just a couple bucks all the time.

  • I am a magazinephile, it's been hard to cut back now that I don't have an income. Our library sells donated magazine for 10 cents ea, I can usually find some good ones. Your library might do something similar. I can also check them out from the library as well.

  • I do always buy Martha Stewart Weddings though. I'm not trying to sound pathetic- I really like the photography and I get inspired by the color schemes shown. I've gotten some good party ideas (like for my 25th) too.

  • I can usually find great deals at Fashion Bug- every now and then there's something good and cheap on clearance. I recently got a little cover-up jacket for $11.

  • One good thing about PA- you don't pay sales tax on certain neccessities, like shoes. I didn't know that til I bought a pair of tennies last month! People come here from neighboring states to shop. PA does ream you in other tax areas, though so I don't know if that's really a bargain.

  • I buy my scrapbooking staples, like adhesive and ribbon, etc at Wal-Mart. I love glue dots- they hold anything together! Wal-Mart has stepped up their scrapbook selection- I love the new Martha Stewart products they carry.

  • I save all my useable scraps of cardstock- and I use them! I have a drawer full of scraps. By now, I have pretty much any size/color I need. I can make little accents on cards and pages.
  • Anything for scrapbooking that I buy has to have multiple functions- like with rubber stamps. They have to be generic enough that I can use them in several different ways on my cards and pages.

  • Stressed? Try playing with a kneaded eraser- it's similar to silly putty and helps break boredom and tension in my classes.

That's what I got so far, maybe I can think of more hints later.

October 27, 2008

Cardboard

Here is my cardboard carousel horse project in the er, flesh. The goal of this sculpture assignment was to take architechtural elements and create a sculpture that was not building-like. I took amusement park pieces to create a carousel horse. It took a LOT of time to make and it turned out HUGE! I made the body too big and from there the other pieces had to be big, too. Maybe I'll make a smaller one. I had to lay down the seat in the Jeep to get it to school! I am pround that it stands on its own. I got pretty nice reviews from my class and teacher during critique. Cardboard and hot glue are way stronger than you might think!


The front:

Body: ticket booth, neck: ferris wheel, head: bench seat on carousel, legs: horse tail, rollercoaster track, log ride and rollercoaster cars, thigh: carousel top framing, tail: wooden roller coaster
Front 3/4 view:

Back view:

Rear 3/4 view:

Detail of ticket booth on back (taken from above)
Detail of rollercoaster tail:
Funnily enough, someone else's sculpture made a fence or "paddock" for my horse!


Now, if I hadn't told you what the sculpture was, would you have recognized what it was? Funny Story: There is this girl in class who is a little dense...I don't know if she pays attention or what during critique. You'll be explaining something in depth and then she'll go and ask about what you just explained as though you had never spoken! It happens all the time during our critiques. So I tried to make it an obvious horse shape and I think I succeeded because everyone who walked into the classroom observed it was a carousel horse (they'd never seen it before critique day) in nanoseconds. During critique, we spent at least 15 minutes talking about my horse, my teacher talked about the ride architecture specifically making a horse, we talked about legs, it's tail, body, etc. We were not vaugue during critique as to what it was. Even if you didn't know what it was before, you should have known by listening to critique.
Then after class she comes up to me and says "You want to know what I see in your piece?" and I was like, uh..sure. She then proceeds to say "If you look at it from this angle, it looks like a horse!" as though she had discovered it was a horse and no one else had! She then asked "Did you see that it was a horse when you were making it?"
I tried real hard not to look too dumbfounded, what do you say? "Uh, yeah, I knew it was a horse." I could have totally made a smart aleck comment but was nice and didn't. I was thinking "Gee, it's a horse? Nooo...couldn't tell it was a horse after spending 25 hours on it!"


Some people crack me up.

October 16, 2008

Embroidery

Right about the end of August I got back into embroidery...after a hiatus of years. Decades, even. I used to do this stuff when I was a kid, I've enjoyed getting back into it. It's very relaxing to do at the end of the day, and highly addictive!

The above picture is four flour sack dishclothes that I did- in my dream house my kitchen will be aqua and white with red retro accents, so that's the color combo I chose. There's still 3 to do in this set of 7 designs- one for each day of the week. They go pretty fast- just a few evenings of sewing and it's DONE! It's a great feeling to get a project completed!

We have a bunch of these flour sacks sewn by my great grandmothers...doing this kind of work makes me feel connected to them. I think that handiworks such as this are like a sign saying "I was here." What do I treasure more from my ancestors...the things they owned or the things they made? While I enjoy objects or furniture that they owned, I feel a special connection to the things they made. Their handiworks outlasted them, these will probably outlast me. It's partly why I like to make things- to create a history.

I have doilies from my great grandmother that I want to put in frames...always something on the to-do list.

Something tells me I will wind up sewing millions of embroidered flour sack dishclothes for my hope chest! Lol

September 25, 2008

Camera

I started getting sick on Tuesday with a really sore throat, cough, runny nose and fever and yesterday was just awful. I didn't want to go anywhere today, but I had to turn in this:


This is my wire project for 3-D art, you had to recreate an object and imply volume. I'm pretty pleased with the results, it was a lot of work. I had critique earlier today in class and it went well. My teacher liked it. I chose a camera because 1) I'm a photographer, 2) I collect antique cameras and 3) the structure lent itself well to a linear project like this (other people did stuffed animals which would be hard to do with wire). I tend to ask myself this question when deciding what to make: What do I want kicking around afterwards when it's all done? Hmmm...a camera.

September 4, 2008

Project Wire

For the first project in 3-D art (basically a beginning sculpture class), we are recreating a three dimensional object out of wire. I am planning on making an antique camera. But first, we had to make four practice pieces based off of artwork or photos in books. Here are my pieces- I like the lone butterfly the best. Working with wire is trickier than you might think. We are spending the next few weeks making the real project, and I'll show that when it's finished.


Butterfly (of course):
Lighthouse:
Butterfly with a Pansy:
and a Carousel Horse:

September 2, 2008

Antique Quilt Top

As I mentioned earlier, my mom and I purchased this antique quilt top from an antique store in Erie a couple of weeks ago. I just had to talk more about it. The pattern in called "Autumn Leaves" (I was so excited when I found it in a quilt book!) and it became popular in the '30s and '40s after it was shown at the Chicago World's Fair in 1933. This quilt top is from that time. It is a delight to behold in person- mom and I just couldn't walk away. It's in really great condition. The workmanship is absolutely incredible- every stitch is hand sewn in perfect, tiny stitches. The mitered corners match up perfectly. Nearly every leaf is of a different fabric (only one or two are the same). I cannot imagine the hours spent on this.
Which brings up the question...who made this? We'll never know. The woman who had it in the store bought it a long time ago at an estate sale in the area and didn't know very much about it. One also has to ponder why it was never finished into a whole quilt. What we do know is this: whoever made this quilt top was very talented, both at sewing and at putting colors together. There is no area that looks "off" or out of place. The colors are well balanced. All the principles of design apply here.
Mom and I are doing our homework- how should we finish it? The quilt top is made for a Full bed, we will probably add a border or something to enlarge it a little to be Queen sized. There are several independent fabric stores around here that carry reproduction '30s fabric that we will have to go see. We need to find a backing fabric, fabric to bind the edges and perhaps fabric to make a border. We also need to figure out how to actually quilt it too- where should we put the stitches? Is there a design we should use? It'll be an adventure.
I know, I know- I really don't need any more projects...but I couldn't pass it up! It's funny that I like this quilt so much since I am really not a "yellow" person, but for some reason I love this quilt! It cheers me up.


May 13, 2008

Final Project


Here's the two pieces I did for my final project in art. I did a pendant and a ring using wax butterflies that I molded from a plastic butterfly. I had plans to do a bracelet as well, but that proved to be too difficult for the short time allotted. I received a B, better than what I thought I'd get. I like butterflies, what can I say?