December 31, 2011

I'm Dreaming of a Pink Christmas

I helped my friend makeover her place for her first Christmas in her new apartment. Since she already had pink going on, we decided to create a pink Christmas- red and green would have clashed!

Who says Christmas has to be red and green? It's fun to be creative!
I pulled out all my pink and silver things and also had fun creating a couple things.

We set out to have the girliest Christmas ever and I think we accomplished it!

Here's the tree:


 Had some silver trees too:
Note the pink shoe ornaments on the tree!

 Closeup of tree:


Wall of love:


The mantle:


Made the pink crepe tree on the right, showed you how in my last post:


I made the wreath over the mantle- it takes some ribbon but it's easy!
All you do is tie bows over a styrofoam wreath form (I painted it pink first).

Hung this ornament from a doorway:


Loved the pink wreath and big bows in the couch area:


And here's the whole room, tah duh!


It was a girly Christmas, I loved how it turned out! 

You can't help but be happy in this room.

Hope you had a Merry Crafty Christmas too!

December 21, 2011

O Crepe Paper Tree

I am helping my friend make a pink and silver Christmas this year, it's been so much fun to find things for her living room..or make them! I love a vintage look and decided to make this little tree using 1) a foam cone, 2)  pink paint, 3) crepe paper streamers and 4) tin foil/hot glue. Really the only expensive thing is the cone, the roll of streamers was a buck!

I painted the cone pink in case any of it showed, it helps to water down the paint a little so that it gets in all the crevices of the styrofoam.

Take a length of streamer a bit longer than the circumference of the base of your cone, if it's too long you can snip it later on. I folded over the rough torn edge so that it wouldn't show, and then stretched the crepe paper along one edge, creating a ruffledy effect.

When using hot glue, PLEASE be careful- it's easy to burn yourself pushing the crepe paper down to the cone- paper doesn't offer much protection from hot glue.


See how it ruffles?

Using hot glue, tack down a folded over end for the bottom row. As you glue around, gather up the crepe paper so that it ruffles even more. When you get back around to your starting point, trim the edge and fold it under, gluing it so that it overlaps the starting point. 

Keep adding layers (getting even vertical spacing from the previous row is the hard part).

I hate making trees out of cones that bluntly end and do not make a nice point, so I made my own out of tin foil and hot glued it to the top of my cone. If it's not perfect, it's ok since the ruffles will hide imperfections. 


I then hot glued crepe paper around the tin foil so that there wouldn't be an obvious color difference between the ruffles that were over/under the tin foil. It also provided something more stable to glue to.


Added my final row, pinching it at the top. Try to not use much hot glue, you don't want it to show here.


And voila! A vintage looking crepe paper tree fit for a princess.

Crepe paper comes in so many wonderful colors- just think of the trees you could make!

April 6, 2011

Embroidered Postcard Tutorial

I participated in the Iron Craft Challenge this week, which was to create a postcard. Since I love love love postcards, I couldn't pass it up! I have quite a collection going of vintage postcards.

I had wanted to paint a postcard, but that wasn't going to happen. I decided to embroider a postcard. I've embroidered on scrapbook pages before, it's pretty fun.

Here's some pages I did in the past with embroidery:

 Even the wording was embroidered!
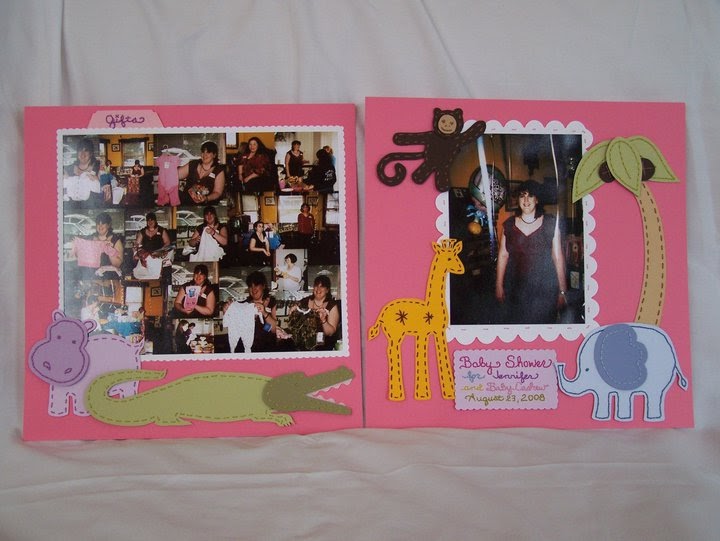
Butterfly gardens:

 Used this butterfly design on my postcard. It's a fave.

Stitched the butterflies to the page and stitched their "trails":

I like butterflies. Who woulda thunk it?


I found some kraft cardstock and found some templates for butterflies. I used tracing paper and traced three from an Aunt Martha's transfer sheet, and the upper right one from a purse of mine.

You'll need two 4x6 inch pieces of kraft cardstock. I used a decorative edge scissor and some chalk ink to make the front stand out. Your front piece is now about a quarter of an inch smaller all the way around than the back piece.

I placed my butterflies and taped them down with very small amounts of masking tape. I then went over the tracings with a pushpin (I have a paper piercer somewhere!) to make holes to sew through. I had a piece of corrugated cardboard underneath to protect my table from the pushpin.

It's important to pay attention when piercing the holes- you have to place a hole where there is a corner and you have to round out a curve. It's also important to not put the holes too close together or you might rip through them when sewing.


 I stamped on the front and began sewing. Keep your tracings handy as a reference when you're sewing- sometimes it's hard to remember how all those dots are arranged.

 
After piercing your postcard, you are left with pretty cardboard!


I designed the back of my postcard backwards so that it would be the correct way when flipped over. Punch the holes for it, too. Be sure your elements are in far enough so that the stitching won't show- your front is about a quarter of an inch smaller all the way around then the backside and there's the potential for the stitching on your backside to show.


Embroider away!

I knotted my embroidery floss when I began (I used two strand of floss for ease) but not when I ended a strand. I just wound it through my stitching and left about 3/4 of an inch for a tail- it's not going anywhere.

I used a smaller needle so that I could pull it through the pre-punched holes easily without the eye of the needle getting stuck.

If your stitching doesn't look the prettiest on the back, who's gonna know?


I used some large flat glue dots (not the "3-D" kind) to attach the front to the back, centering it and being sure to cover the stitching on the backpiece.

Voila!


And the back is cute too!


It might survive the mail, but a better way would probably be to mail it in a greeting card envelope. Or make your own envelope!


My mind is boggling with the postcard possibilities- so many cute motifs to do!